Steps to achieving a professional organizer’s fridge
Steps to achieving a professional organizer’s fridge
For many of us, the kitchen is the center of our home. It serves as a gathering place, a scene for family memories, and the source of meals that feed us. Since its such an important part of our lives, getting it organized and keeping it that way is critical for reducing stress. By following the plan I’ve laid out below, you can make it easier to avoid having spoiled food, messy fridge doors, and bring order to your special place. In partnership with The Container Store, here are five steps and my favorite products to tame the metal ice beast in your kitchen!
Step 1 Clean Out: Start by removing everything from your fridge. This is important for two reasons, 1) it gives you a chance to check expiration dates and 2) it’s the perfect time to wipe clean all the shelves and drawers.
Step 2 Group like items:Grouping like items is important because it allows you to see how much you have of something and will serve as the base for Step 3 Creating Zones. For example, milk, orange juice, and apple juice would all fall under “beverages”. Keep going! and group together all your fruits, vegetables, deli meats, cheeses, and any other category that takes up a large portion of your fridge space.
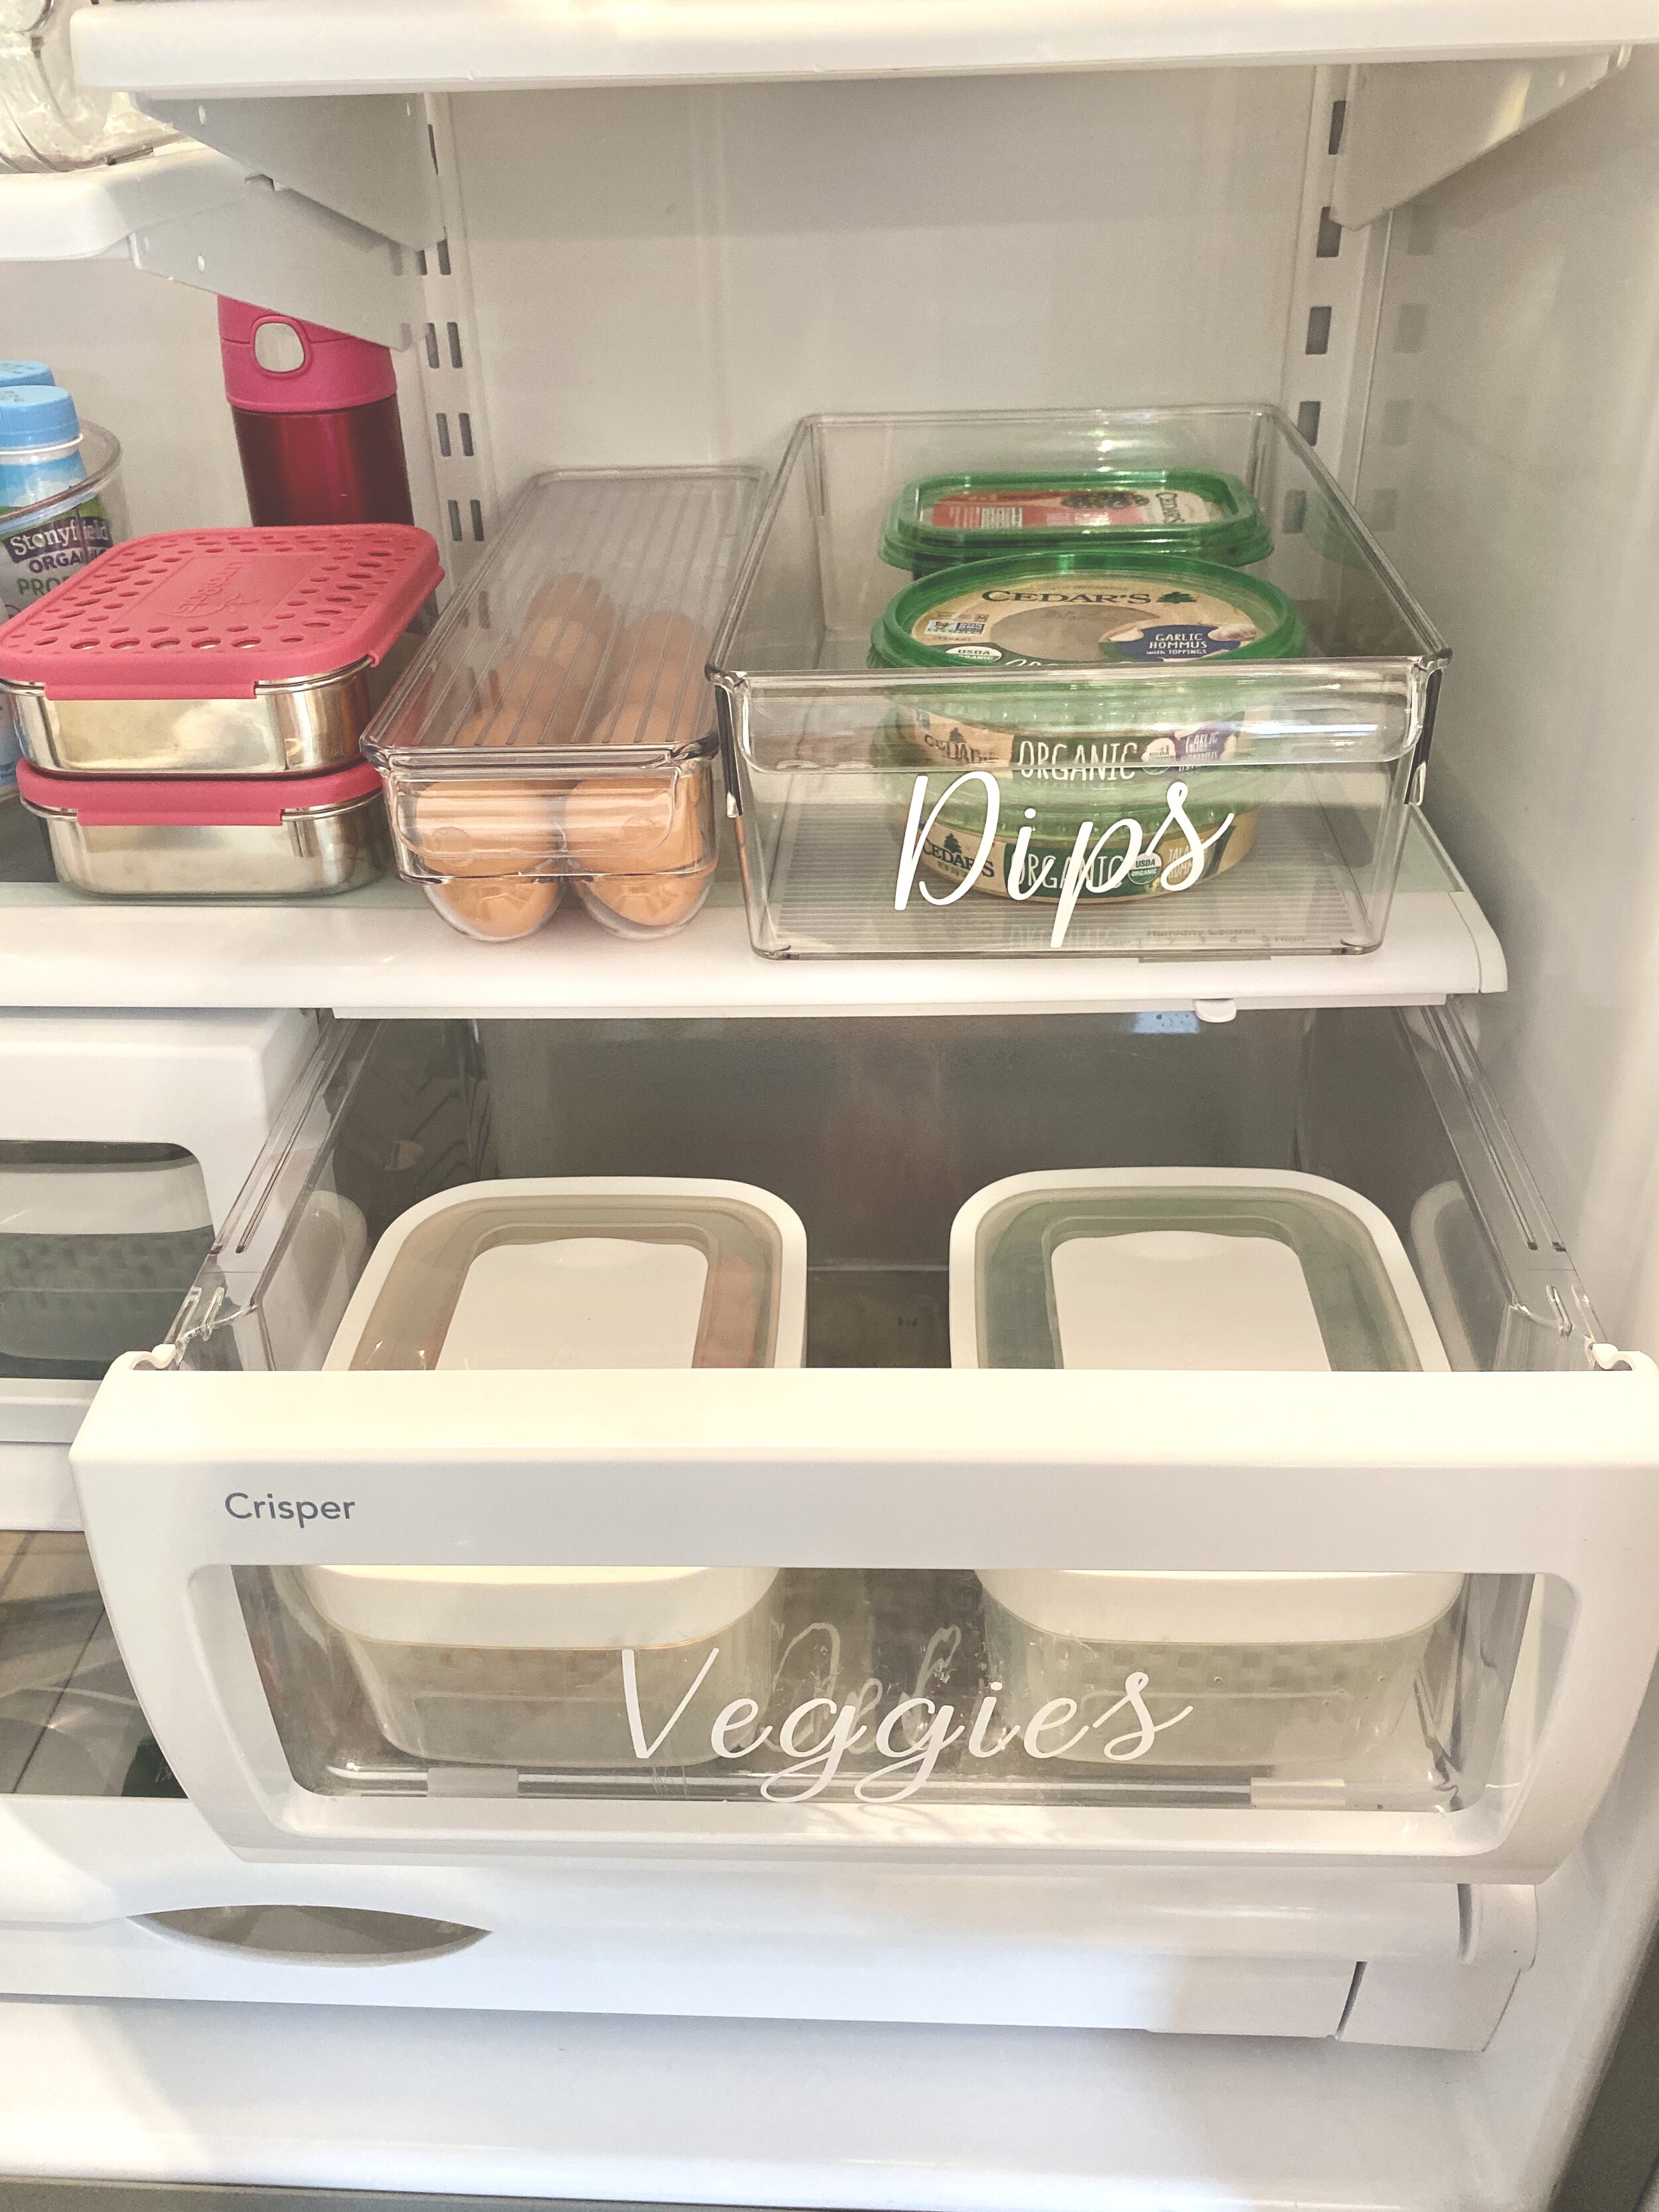
Step 3 Finding Homes: Once you have grouped all your items, you need to find a home for them in your fridge. I always say that the key to organization is “everything has a home”. This simple principle will help you keep any space organized as you train yourself and your family to always place things in their home. Designate these spaces for your groups of items that fit their daily use (kid-friendly items easy to reach) or type (veggies in humidity controlled drawers).
Step 4 Decanting and Bins: Decanting may sound like a lot of work, but it will not only keep your fridge from looking beautiful but also help your food last longer. Decanting properly is key. You want to make sure that you are using the right containers to ensure the best results. In my fridge, I use products from The Container Store that I have linked below -- I love using them because they are reliable and durable.
Step 5 Label: Labeling ensures that everyone who opens your fridge knows exactly where an items’ home is. It’s particularly fun for kids who are learning to read. I used vinyl labels created by my Cricut machine.
As you can see, a supremely organized fridge is not out of reach. While the steps to initially get it in shape are not challenging, the key here is to make it a habit for everyone to keep it that way. Finding homes for your groups of items and making it easy to keep them in their homes with the right products will make all the difference when it comes to organizing your fridge.
All items have been linked!